Table of contents
The following article is part of a series of articles that will help you build a DAO on the Flow network using Cadence.
In the previous article, we developed and deployed(to Testnet) our first Cadence smart contract: the Whitelist. Now, we’ll develop a basic frontend application that will interact with our smart contract on the Flow blockchain. It won’t have any fancy styling, we’ll leave that to the next part of this guide.
The Tools
For this dApp we’ll use React with Vite. We won’t be using. npx create-react-app. Instead, we’ll be using npm create vite@latest
Why? Well, ‘create-react-app’ has a couple of problems that come with using it. First, it’s really slow to use in development, and secondly, it’s just not ready for production or scaling. On top of that, it has no nice built-in features; there’s no server-side generation, and using TypeScript is more difficult than necessary, and that’s pretty much the case for all the many other extra things that you just want in your app.
Now, Vite is very similar to creating react-app as it gives you similar outputs, but it’s going to be way faster.
How? Well, when cold-starting the dev server, a bundler-based build setup(like create-react-app) has to eagerly crawl and build your entire application before it can be served. Vite improves the dev server start time by first dividing the modules in an application into two categories: dependencies and source code.
Vite serves source code over native ESM. This is essentially letting the browser take over part of the job of a bundler: Vite only needs to transform and serve source code on demand, as the browser requests it. Code behind conditional dynamic imports is only processed if actually used on the current screen.

Here’s how create-react-app works

Here’s how Vite works
Let’s start!
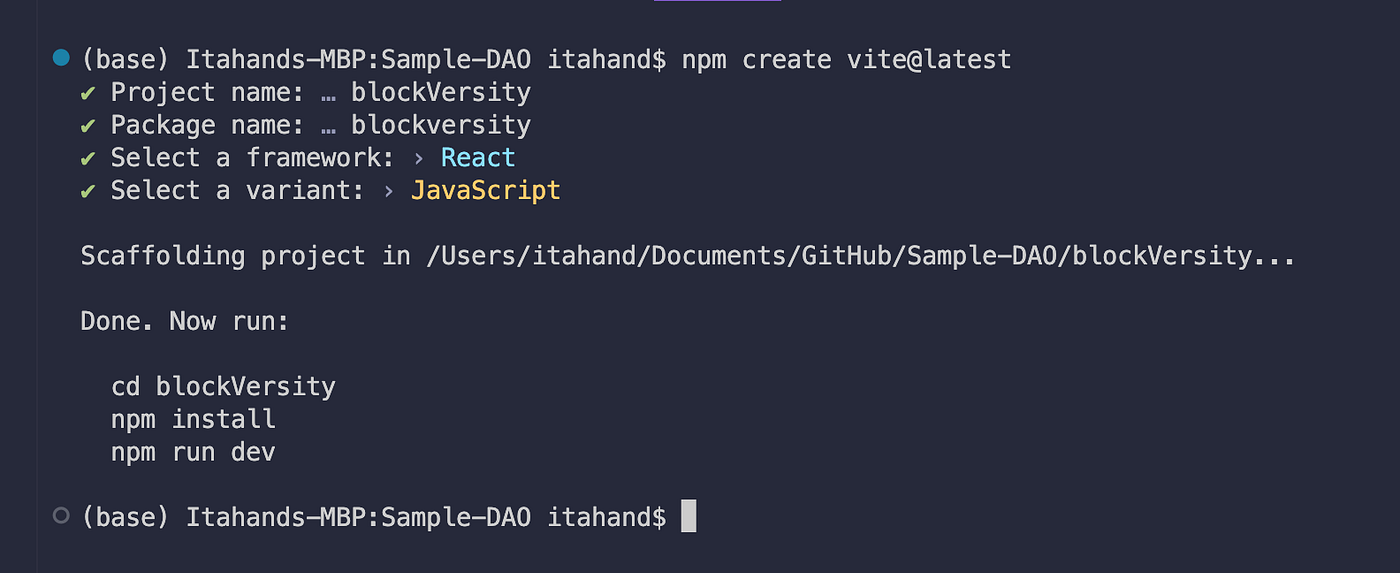
In the root directory of your project, open your terminal and type npm create vite@latest. I’m assuming that you have node.js and the previous requirements installed. Inside the Vite console menu, type your app’s and package name, select React as your framework and JavaScript as your variant.

Now, follow the instructions by Vite to install dependencies. Once dependencies are done installing, run npm run dev on the terminal and right-click on the local url that it gives you. You should see something like this

App.jsx default template
Once inside your app’s folder, you should be able to see an src folder containing your react app. Inside of src, we’re going to create a folder called Flow and inside of it we’ll create two more folders: Scripts and Transactions

From these folders, we’ll import our scripts and transactions that are required in order to interact with the blockchain. But before that, you need to have an account and in order to create an account you need a wallet… and to integrate a Flow wallet to your app you need a Flow Client Library (FCL) configuration.
Open the terminal and type npm i @onflow/fclin it. Then, inside the Flow library, let’s create a file called config.js and inside of it, we’ll copy the following:
import { config } from "@onflow/fcl";
config()
.put('app.detail.title', "Sample DAO")
.put('app.detail.icon', 'https://clipground.com/images/placeholder-logo-6.png')
.put('accessNode.api', 'https://rest-testnet.onflow.org')
.put('discovery.wallet', 'https://fcl-discovery.onflow.org/testnet/authn');
FCL has a mechanism that lets you configure various aspects of FCL. The main idea here (from an FCL perspective) should be that when you move from one instance of the Flow Blockchain to another (Local Emulator to Testnet to Mainnet) the only thing you should need to change is your configuration.
Values only need to be set once. It is recommended to do this once and as early in the life cycle as possible. To set a configuration value, the put method on the config instance needs to be called, the put method returns the config instance so they can be chained.
I’ll explain what’s happening here:
app.detail.title — Your applications title, can be requested by wallets and other services.
app.detail.icon — Url for your application's icon, can be requested by wallets and other services.
accessNode.api–Api URL for the Flow Blockchain Access Node you want to be communicating with.
discovery.wallet–Points FCL at the Wallet or Wallet Discovery mechanism.
Save your config file and now create another file in the Flow folder called actions.js and in it we’ll import our fcl configuration.
import * as fcl from "@onflow/fcl";
import './config';
Our config file will let our functions know with which Flow network our dApp should connect and with which wallet provider/s.
Now, we need to create a couple of lifecycle functions around authorizing, connecting, and disconnecting our users. Right under our imports, write the following code:
// Lifecycle FCL Auth functions
export const logOut = () => fcl.unauthenticate();
export const logIn = async () => await fcl.logIn();
export const signUp = () => fcl.signUp();
export const currentUser = () => fcl.currentUser()
The concept of authentication in FCL is tied closely to FCL’s concept of currentUser, so let’s look at currentUser.
As a dApp developer, using FCL, our current thought is to enable three main pieces of functionality.
How to know the currentUser and if they are logged in.
How to log a user in.
How to log a user out.
Due to the nature of how FCL works, logging a user in and signing a user up are the same thing.
Beginning of frontend integration
Now we can sign up, log in and log out our users, and we can also record data from them. Let’s prove this very quickly by testing it on our frontend. On our App.jsx file let’s import our fcl functionality like this:
import {
logIn,
currentUser,
logOut,
} from "./Flow/actions";
After importing our functions our file should look like this:

How your App.jsx file should look after removing some unnecessary elements
And now let’s save it and try to run npm run dev to see what it looks like on the browser. Oh wait; there’s nothing there!

The page went blank for no apparent reason
My browser is completely blank(and it shouldn’t) and it happened right after I imported those functions from action.js What’s going on?
Well, working with the Flow Client Library brings an unexpected challenge when trying to integrate it into a frontend built and developed with Vite. This is mainly because the Flow Client Library uses a method called node-fetch that doesn’t work client-side, so it crashes the application.
So to solve this problem, we’re going to run npm i isomorphic-fetch and then we’re going to change our vite.config.js file to:
import { defineConfig } from 'vite'
import react from '@vitejs/plugin-react'
// https://vitejs.dev/config/
export default defineConfig({
  plugins: [react()],
  resolve: {
    alias: {
      'node-fetch': 'isomorphic-fetch',
    },
   },
});
The line that I added to the Vite configuration changes all the node-fetch methods to isomorphic-fetch, which does work client-side. Once that’s done, try running npm run dev again and check your browser.

This is how the page should look without the bug
Now that we fixed that, let’s integrate our functions and for that, we need a couple of buttons. Inside the div card introduces two buttons like this:
      <div className="card">
        <button onClick={() => logIn()}>
          Connect
        </button>
        <button onClick={() => logOut()}>
          Disconnect
        </button>
      </div>
This will allow us to connect and disconnect our accounts from the dApp, but once we click on them, we won’t notice any difference! So let’s include a variable to display the connected user’s address, and for this, we’ll need to import the useEffect and useState functions from the react library.
First, we’ll create a user variable with useState and we will set it to null
const [user, setUser] = useState(null);
And then, we’ll use useEffect to subscribe to our current user. FCL provides two ways of getting the current users information. One way is a promise that returns a snapshot of the info, while the other way allows you to subscribe to info, calling a callback function with the latest info anytime it changes. This callback function will be setUser
  useEffect(() => {
    currentUser().subscribe(setUser);
  }, []);
And right below our Vite + React title, we’ll incorporate
<h1>User's Address: {user?.addr}</h1>
It all should look like this in the end.

Snapshot of our App.jsx
Alright, let’s test it out! Click on connect and a modal should pop up and it will give you a list of wallet providers that you can choose from. For this scenario, we’re going to click on Blocto

It will ask for your email address to send you a code which you’ll have to type in to confirm your identity. Once this is done, you will be connected to the Flow network through our wallet authentication and now you have an account that’s tied to your email. Your account’s address should now be reflected on the browser.

And if you click on Disconnect your account address will disappear from the screen.
In the next article, we’ll make the frontend a little bit more organized and styled, and we’ll learn how to mutate and read the blockchain from our dApp.

